Homemade Bread Bowls (Ninja Combi or Oven Recipe)
Crusty bread bowls for soup, proved and baked in the Combi with steam for a crisp crust.
- 2 h 20 min start to finish
- Serves 2 people
- Works on every CombiWorks on your US 14-in-1Works on your UK & EU 12-in-1Works on your India 14-in-1
Set your Combi
- ProveProof35°C95°F45min
- ProveProof35°C95°F45min
- Combi Crisp190°C375°F15min
You'll need
- 250 g2 cups9 oz bread flour
- 1 teaspoon instant yeast
- 240 ml1 cup water (scant 1 Tablespoon, divided in recipe)
- 1 teaspoon fine grind sea salt or kosher salt
Method
Making the Dough
- In the bowl of a stand mixer add the flour and yeast. Using the dough hook, mix the two together on low speed for about . Measure 240 ml1 cup of water and remove 1 Tablespoon. Add ½ of the water and mix on low speed for . Add the salt and the remaining water. Mix on low speed (#2 on a KitchenAid mixer) for or until the flour has absorbed all of the water. The dough should be slightly tacky, but not sticking to your hands. See recipe notes on tips to get the correct dough consistency. Mix on low speed for about . Once the dough has pulled away from the bowl, but is sticking to the bottom in the size of a quarter to half dollar, your dough is properly hydrated and kneaded. It should be smooth and slightly tacky.
Proofing
- Ninja Combi Proofing: Form the dough into a ball and place in the bottom of the Ninja Combi pan (no rack needed). Select the proof function and set the temp to 35°C95°F and the time to .Room Temp Proofing: Place the dough in a bowl and cover with plastic wrap. Let it rise at room temperature until it doubles in size. This will take anywhere from to depending on the temperature in your house. *you can oil the Combi pan or bowl with a little olive oil, but it isn’t necessary.
Shaping
- Once the dough has doubled, divide it in half and shape each piece. Place your dough on an unfloured surface (you want some friction). Cup your hands around the dough with your pinky fingers touching the surface.Drag the dough toward you with your pinkies, then rotate the dough about a quarter turn.Repeat the dragging and rotating motion several times. This pulls the outer surface of the dough downward and creates tension on top.The dough will gradually form a smoother, tighter ball with a taut surface.The goal is to create surface tension without tearing the dough. The bottom will look a bit gathered or “seamed” while the top becomes smooth and rounded. This tension helps the dough hold its shape and rise upward rather than outward during baking.
Second ProveProof
- Ninja Combi: Put 60 ml¼ cup of water into the Combi pan and place the crisping tray inside. It is easier to do this now so you don’t have to move the dough after the second proof. Cut a piece of parchment to cover the tray and place the dough balls catty corner ensuring there is enough room for them to rise. ProveProof on 35°C95°F for . Room Temperature: After the dough is shaped, place it on a parchment lined tray that you plan on baking on. Dust the tops of the dough balls with flour and lightly cover with a dish towel or plastic wrap. Make sure the dough can rise so don’t use anything heavy to cover it with.
Scoring & Baking
- Once the dough has risen the second time, use a sharp knife or bread lame to score the tops about ½” into the dough. I recommend making an “X” to allow for the best expansion during baking. Ninja Combi: Place the pan with the scored dough bake into the Combi and select CombiCrisp. Set the temperature to 190°C375°F and the time for . Press Start. When there is about left of the the cooking time, open the door and pull the parchment paper so the bottoms of the rolls crisp up. Oven: Place the tray into a preheated 200°C400°F oven on the middle rack and bake for or until they are golden brown and the internal temperature of the bread is over 94°C200°F.
Our tip Score each line with one quick, firm stroke. Sawing back and forth drags the risen dough and knocks the air out of it.
Preparing the Bread Bowls for Soup or Dip
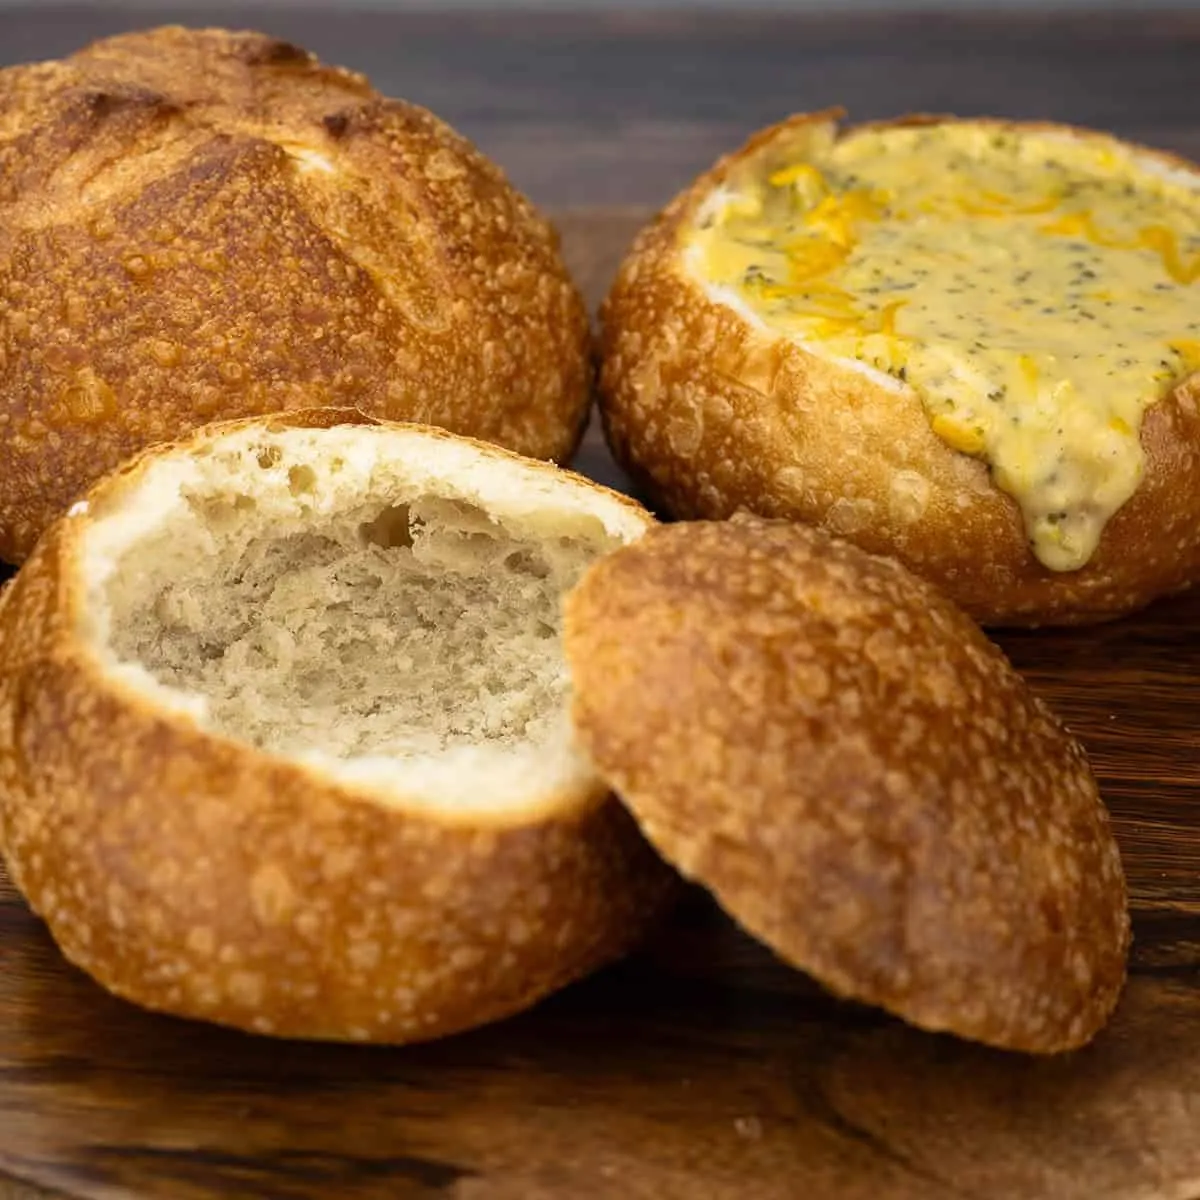
- Allow the bread bowls to cool completely on a cooling rack. This can take . Cut ½” off the top of the bread bowl and remove the inside bread with your fingers, but make sure to leave at least ½” of the bread that is close to the crust. This will make sure your bread bowls are sturdy enough to hold your soup or dip.*Use the removed bread pieces for croutons or dunking in your soup or dip. Fill with your favorite heart soup or dip and Serve!
Tips from The Salted Pepper
Dough Consistency
When making bread dough, the amount of water you need will vary based on your environment so use the liquid amount as a guide only.
The dough is the right consistency when it is slightly tacky to touch, but not sticking to your fingers.
When using a stand mixer, another way to tell is to look at the very bottom of the bowl. The dough should be climbing up the dough hook, but sticking to the bottom in the size of a quarter. This indicates the right hydration level for this recipe.
If it isn’t sticking to the bottom, it could be too dry and I recommend adding 1 teaspoon of water and mixing another minute. You can repeat this until the dough is sticking just a little bit to the bottom of the bowl.
If the dough is sticking to the entire bottom of the bowl, it is too wet, add 1-3 teaspoons of flour and mix for another minute or two. This can also be repeated until the dough is sticking to the bottom of the bowl in the size of a quarter (up to a half dollar) and the dough should feel smooth and slightly tacky.
The dough is perfectly kneaded when it can stretch without tearing.
The video
It plays from YouTube once you press Play, and YouTube may set cookies then.
Source: Homemade Bread Bowls (Ninja Combi or Oven Recipe), The Salted Pepper
From Combi Recipes: https://combirecipes.com/recipes/thesaltedpepper--homemade-bread-bowls/